Create and Edit Blog Entries in the Original Course View
Blogs are an effective way for you to share knowledge and materials created and collected in the course. You can post entries and add comments to existing blogs. Use your blog to express your ideas and share them with the class.
Blogs are similar to other communication tools in Blackboard, like discussion boards and journals, in that they allow you to share your thoughts, observations, and reflections with the class. Other class members can read your blog and post comments on your entries. Reading blog posts is a great way to get to know the other students in your class!
Your instructor may assign a grade to your blog and the comments you post after reading other students’ blogs as a way to evaluate participation and your contributions to the class. Your instructor may also set up a class blog where everyone can contribute their reflections about the class and comment on the entries.
What are blogs and How to Use Them
Each blog entry you make can include any combination of text, images, links, multimedia, mashups, and attachments. You can use your blog to express your ideas and share them with the class.
As the owner of a blog, you will want to create multiple entries over a period of time. Your instructor and course members can then add comments. A blog can also be owned by the course or a group. In the Group area, all members of a Group can create entries for the same blog, building upon one another. Any course member can read and comment on a Group Blog, but cannot make entries if they are not a member of the group.
Accessing blogs
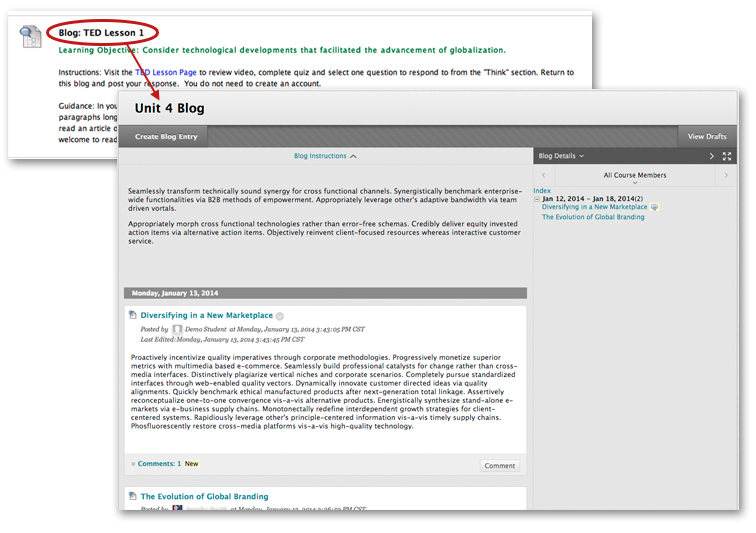
You can only access the Blogs tool from within a course. To access the blog tool, click on the link on the Course Menu. Your instructor may also include a link to the blog tool inside your course’s content areas (i.e. Learning Modules, Content Folders, etc.).
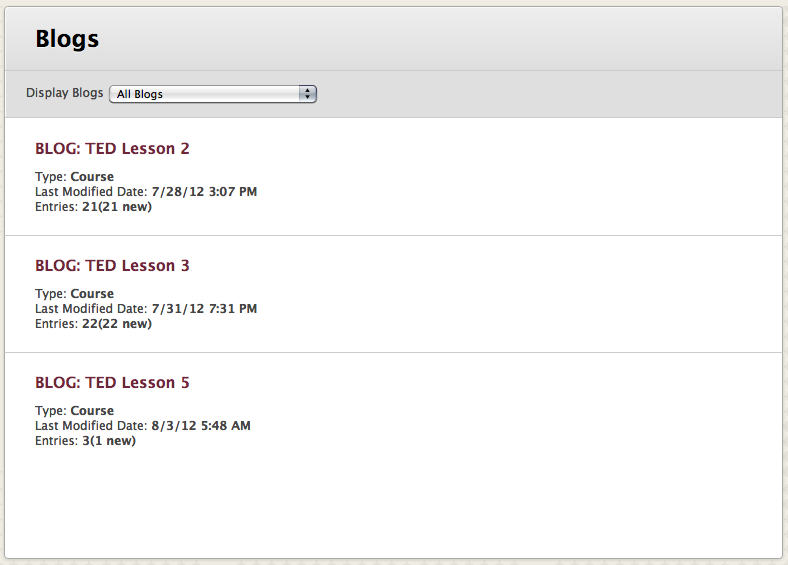
If your instructor has linked to the Blog tool, you will be taken to the Blog Listing page where the blog topics appear in alphabetical order. On the Blogs listing page, under each Blog title, you can see if the blog belongs to a group, the course, or to individual students.
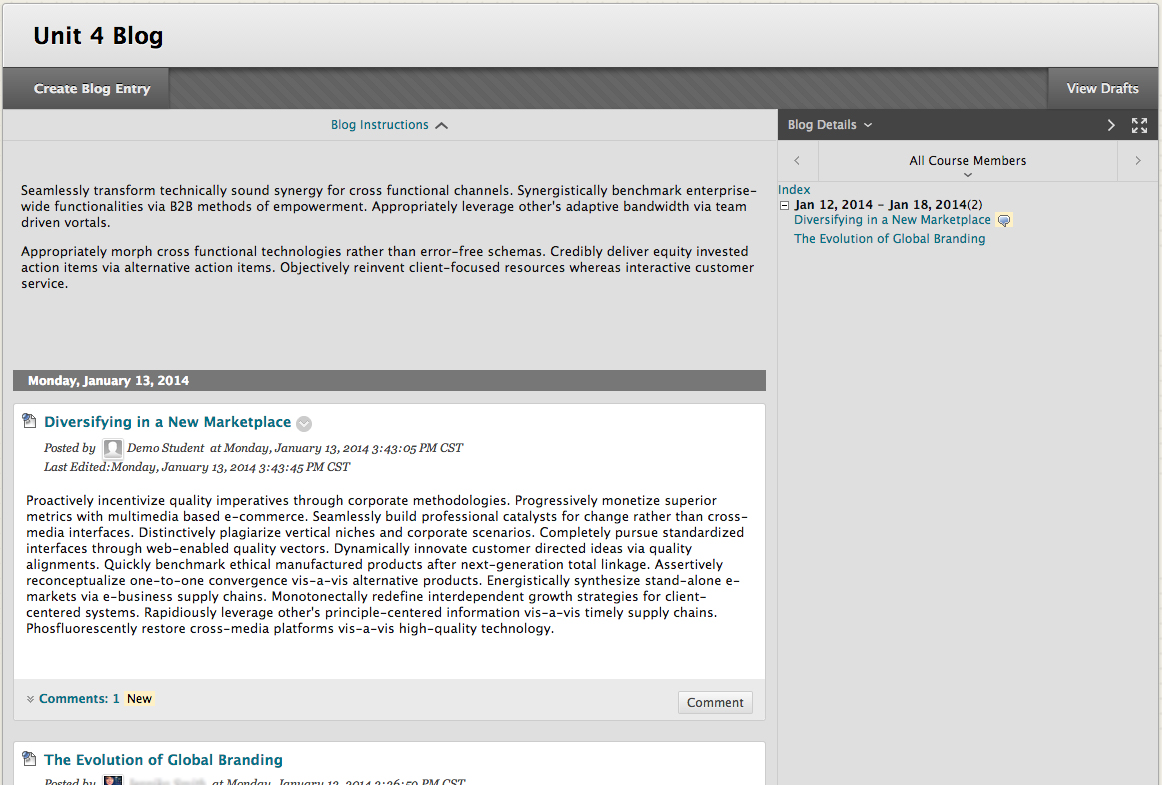
Instructors can also link directly to Blog Topic pages. The Blog topic page is divided into two main sections. You can view the Instructions in the content frame. Click the X to collapse the field. In the side panel, you can view information about the blog. You can expand and collapse sections in the side panel using the right caret (>) and caron (∨) respectively.
Creating a Blog entry
Only your instructor can create a blog, but once created, you can create entries.
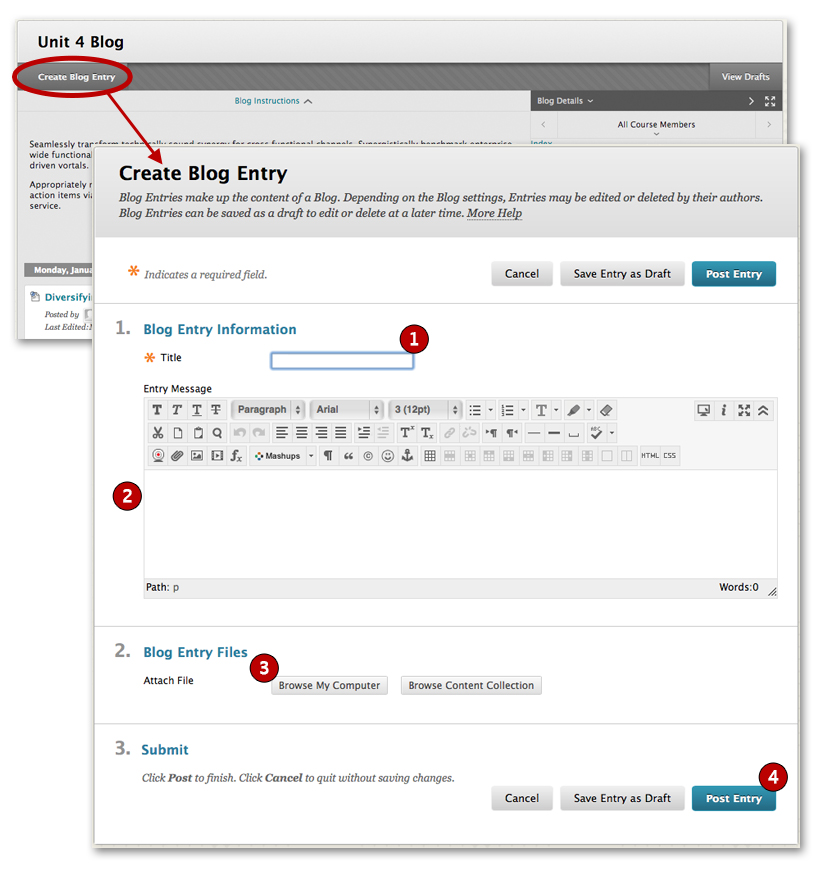
To create a blog entry, first navigate to a Blog Topic page. Once on the Blog Topic page, click Create Blog Entry. On the Create Blog Entry page:
- Enter a Subject
- Compose your Message
- Attach a file if desired and if the attachment setting has been turned on
- Click Submit
If you are not ready to post your Blog entry, click Save Draft. A copy of your entry will be saved. Any entries saved as drafts can be accessed by clicking View Drafts on the Action Bar.
Commenting on blog entries
Because blogs are meant to be read by others, you can comment on one another’s blog entries, whether they belong to an individual, the course, or a Group. Your instructor determines if comments can be made anonymously or deleted.
To comment on a blog entry:
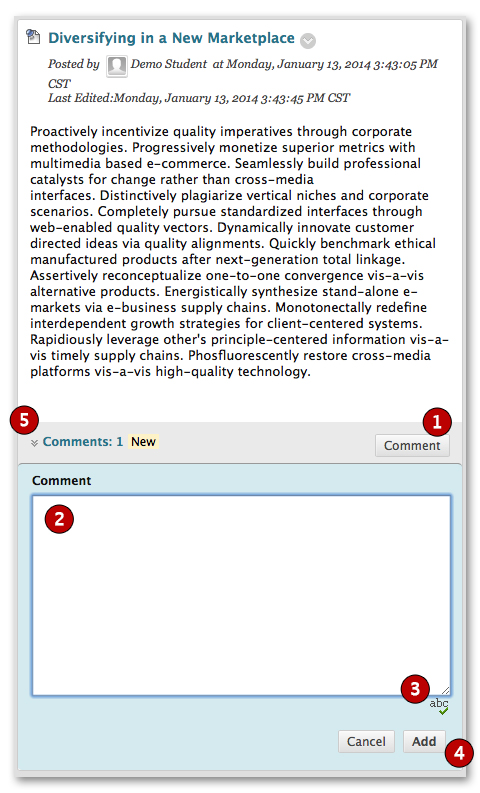
- Click Comment following the user’s entry
- Type your comments in the Comment Box
- Click Check Spelling to run a spell check
- Click Add
- Click the Comments link below the entry to view your comment

Editing and deleting blog entries
Your instructor will determine if you are allowed to edit and delete your blog entries. However, if you edit or delete gradable blog entries, the original graded entry will be lost. If you edit an entry, be sure to mark it as New so others will know you changed the post and they can read it again.
 Editing and Deleting Entries: If you have questions about whether you can edit or delete Blog entries, please ask your instructor.
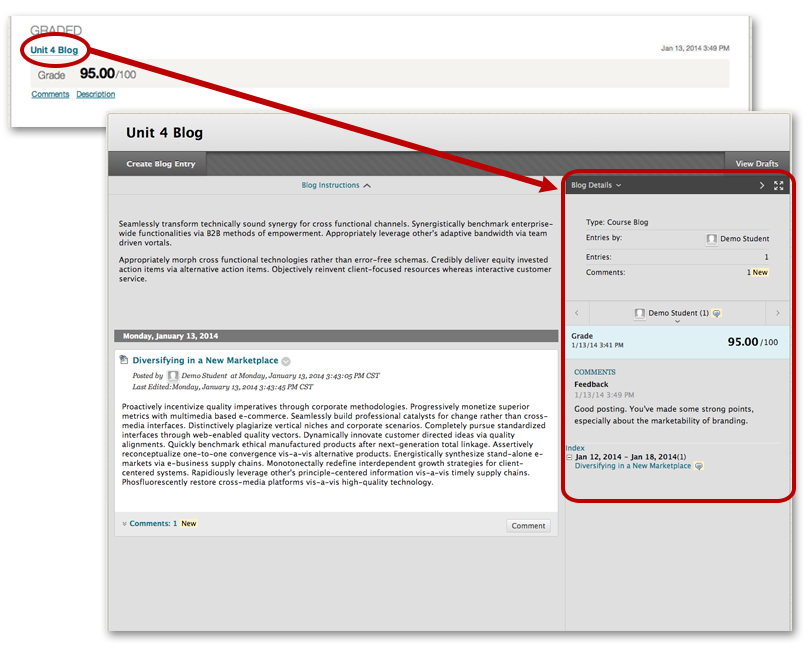
Viewing blog grades
Once Blog entries have been graded, students can view the grade in two places. The easiest way is through the My Grades link on the course menu. Simply click on your score to go to the blog entry and see your grade and comments.
Alternatively, you can access your grade inside the Blog area by clicking your name from the “view entries by:” on the side panel.