Tutorial PDF
Click here to open a new webpage to desktops.ualr.edu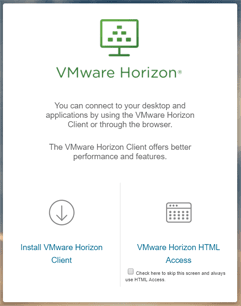
Click “VMware Horizon HTML Access”
Make Sure that on the drop-down menu, student is selected.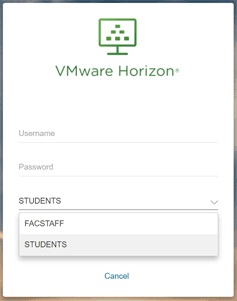
Type in your student domain credentials and the password you set for it. They will be the first part of your UA Little Rock e-mail address.
Click login, here you should see two connections, CSTEM Student and ITS Student Lab. ALWAYS use CSTEM Student. ITS Student Lab is not guaranteed to save your information. Once you click on CSTEM Student, you will be taken to the desktop and will have access to available programs.
Note: Access to some programs on VMware will require a different desktop environment. For example, MATLAB will require you to have access to CSTEM-SYEN. If you are majoring in the relevant department, the appropriate desktop should be available to you. If not, please contact CSTEM IT at [email protected].
Tutorial PDF
Click here to open a new webpage to desktops.ualr.edu
Click “Install VMware Horizon Client”
This will take you to VMware’s download page. From here you should locate your operating system (Windows, Mac OS, Chrome OS, etc.) and then click the corresponding “Go to Downloads” button.
Once you’ve clicked the “Go to Downloads” button, you might be faced with multiple choices of a download. Download the first one you see.
After the download finishes, double click on the file you just downloaded and you should be met with this screen:
Click “Agree & Install” and the program will do the rest. Your computer might prompt you to allow this program to install, click yes.
After it installs, you will need to restart your computer. Once you have restarted your computer, you should see the VMware Horizon Client shortcut on your desktop. Click on this shortcut to open the program.
When you open the program you will see this screen that shows your server connections. Double click this to view your available connections. Remember, ALWAYS use CSTEM Student. If you use ITS Student Lab, your information is not guaranteed to be saved properly on this connection.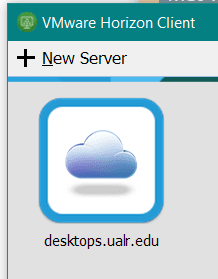
When you double click the connection server, you will be prompted to enter your credentials (the first part of your email and the password you set for the student domain).
After you login, you will be able to connect to the CSTEM Students VM.
Note: Access to some programs on VMware will require a different desktop environment. For example, MATLAB will require you to have access to CSTEM-SYEN. If you are majoring in the relevant department, the appropriate desktop should be available to you. If not, please contact CSTEM IT at [email protected].
Tutorial PDF
When using your desktop in a browser, there is a tool bar on the left hand side. You can access this by clicking on the small ribbon.
This tool bar shows the different connections that are available to you as well as provides a few functions for importing files, copying and pasting, sending the ctrl-alt-del command, and a menu list for logging out and a few other tasks.
Here are examples of the different tasks available through this tool bar.
Sending a CTRL + ALT + DEL Command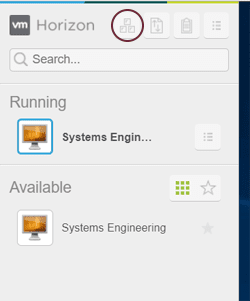
Transferring Files to and from the Virtual Environment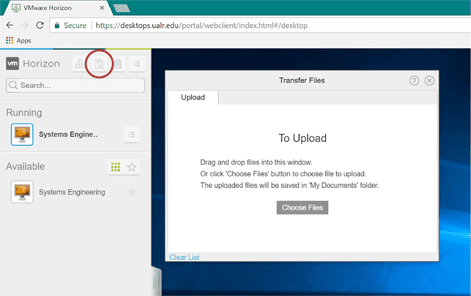
Copying and Pasting Between the Virtual Environment and Your OS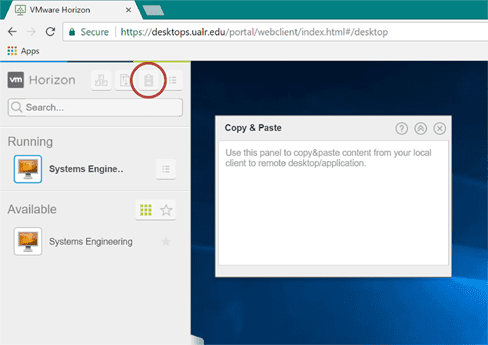
Menu List for Logging out and Other Tasks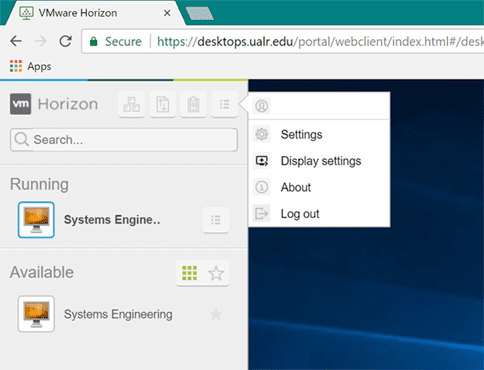
Tutorial PDF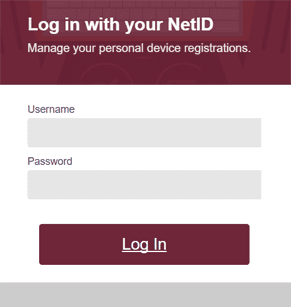
Click here to open a new webpage to access.ualr.edu.
Log in using your Net ID and the password you set for it.
Once logged in, you will see your registered devices. From here you can also register new devices, manage them, or log out.
To add a new device, click “Add new device”.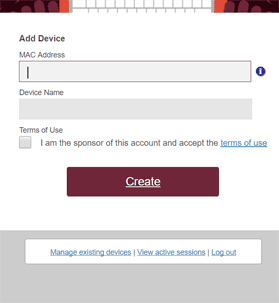
You will be taken to a page where you can enter the devices Mac address and name the device. Once finished, agree to the terms and click “Create”.
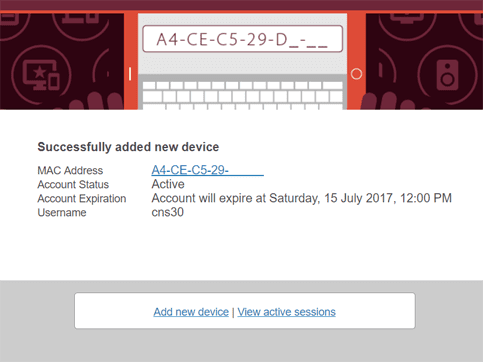
Once added, you will see the summary of your device. Your device is now authenticated.
Click “View active sessions” to view authenticated devices that are active now.
Click “Manage existing devices”.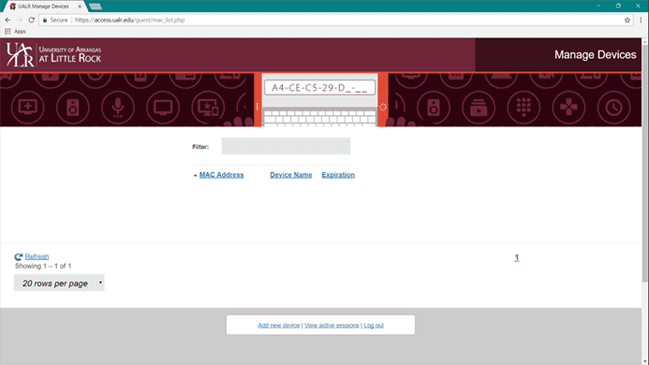
This is where you can edit, delete, or disable devices that you have authenticated.
Tutorial PDF
Click the Start button and type “Services.msc”.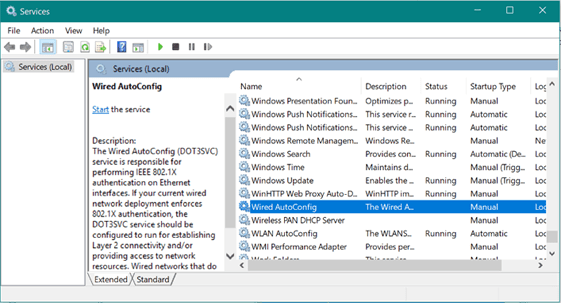
In the services window, find the service titled “Wired AutoConfig”.
Right click on “Wired AutoConfig” and click “Properties”.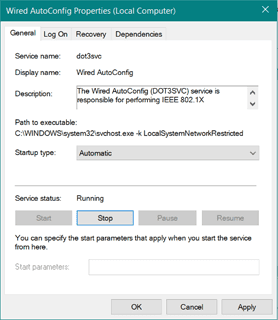
Select “Automatic” from the drop-down next to “Startup Type” and click OK then Apply.
Restart your computer.
Right click on the network icon in the lower right hand corner of your screen. Click on “Open Network and Internet Settings.”
From there, Click on “Network and Sharing Center.”
Click on the blue text next to “Connections” and then select properties.
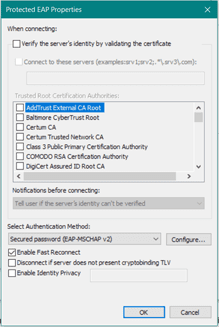
Click on the Authentication tab and make sure that IEEE 802.1X authentication is enabled and that the authentication method is Microsoft:Protected EAP (PEAP).
Click settings next to network authentication method and make sure to uncheck “Verify the server’s identity by validating the certificate” and click OK.
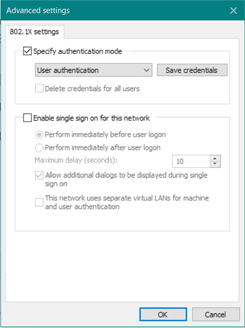
Click “Additional Settings” and select “Specify authentication mode”. Select “User authentication” then click “Save credentials”. A window will pop up prompting you for a username and password. Enter your Net ID for the Wifi and the associated password. Exit out of everything and unplug your computer from the Ethernet and plug it back in. You are now able to use UA Little Rock’s wired network!
Tutorial PDF
If you are logging in for the first time on your Chromebook, skip to step 4.
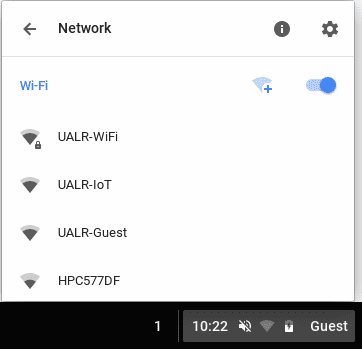
Click on the WiFi symbol in the bottom right corner.
Click on “No Network”
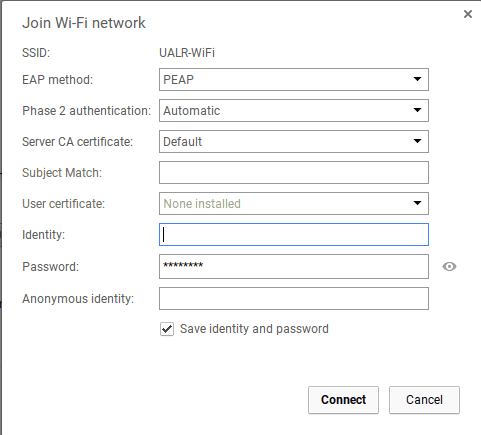
Click on “UALR-WiFi” you will be taken to this screen:
Make sure that next to “EAP Method”, “PEAP” is selected from the drop-down menu.
For Identity and Password, put in your Net ID and its associated password. Make sure “Save Identity and Password” is checked so that you don’t have to log in every time you leave the network.
Click “Connect” and you should be connected to UA Little Rock’s WiFi network! If you experience issues with authentication, please make sure that your Net ID and password are correct before contacting CSTEM IT.
Sign in to your UA Little Rock Gmail account.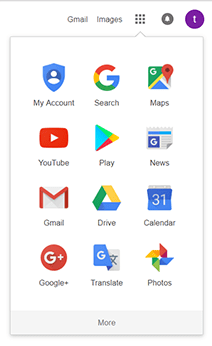
Look at the top right of the screen. You should see 9 squares that form a bigger square. Click on this. (If you do not see these squares, simply google “Google Drive” in your browser).
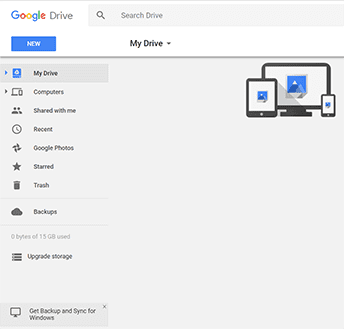
Click on the “Drive” icon and it will take you to this screen.
Click “New” and you will see options to create a new document or to upload documents from your computer. If you open Google Drive in VMware, it will upload files from the VM.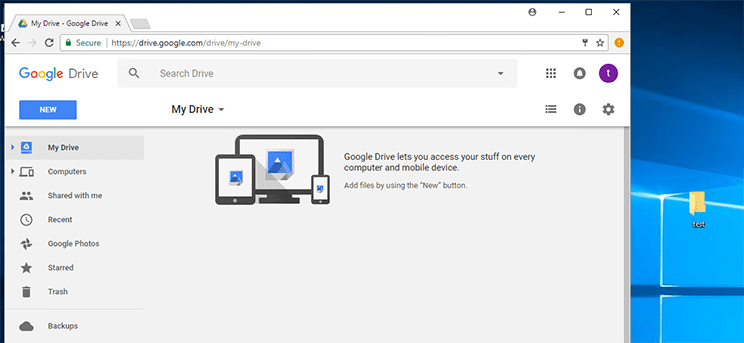
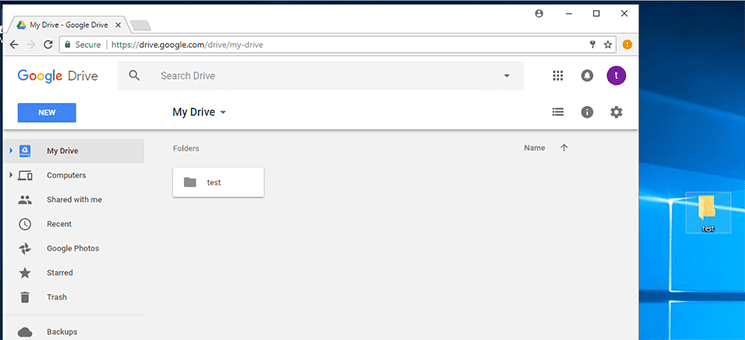
You are also able to drag and drop files from a desktop or folder directly into the browser to upload them to Google Drive.
Once a file or folder is dragged into Google Drive, you can access and download these files anywhere as long as you log into your UA Little Rock e-mail address to access Google Drive.
NOTE: Before reading this, be aware that the CSTEM Lab printer will ONLY print from the Thin Clients located in the lab. You cannot print from personal computers.
Log in to VMware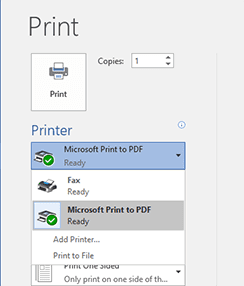
Open up Word or another application you can print from.
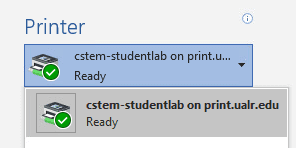
If you do not see the “CSTEM-Lab-Printer” option, close Word or your printing application and go to your desktop.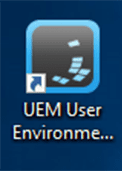
Double click on the “UEM User Environment Refresh” icon on the desktop.
After this, wait a few minutes and then open up Word or a printing application again. Follow steps 1 and 2 again to see if you have the printer.
If you still do not see the printer, close out everything again and double click the “UEM User Environment Refresh” icon again.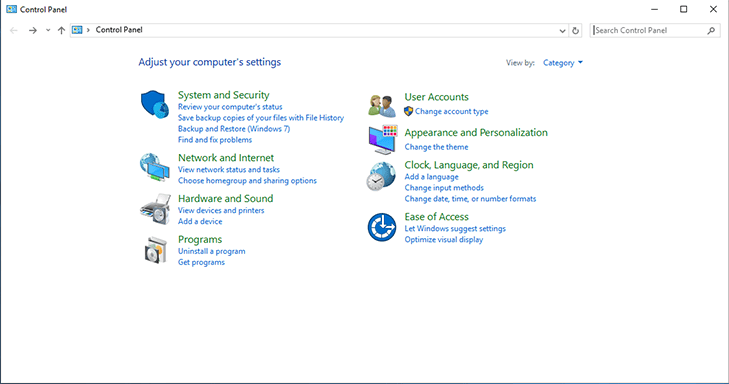
After this, click on the start menu and type “Control Panel” click on the option that says “Control Panel”
Click on “View Devices and Printers” under the “Hardware and Sound” heading.
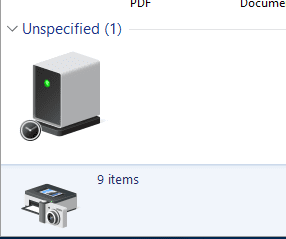
If you see an object under “Unspecified” you should now have access to the CSTEM-Lab printer. If you do not see this, please continue refreshing until you do see it. Once it is there, you are able to print!